Sunday, June 24, 2012

Summer Tuna Salad

Ah, Summer.  Now as we're at the end of June, it's the perfect time for something cool and refreshing.  I've always liked Tuna Salad, but despite the fact that it's made with fish, it's not exactly the most healthy of the salads.  I imagine the tunas swimming around in the ocean, never having a clue that in their last incarnation, they would be swimming around in mayo.  So, today, we have a version that's a bit healthier, developed right in the Buterbaugh kitchen.

I may also add, that after a few rather complex recipes, this is the simplest recipe I've posted yet.

Ingredients:

1 can of Tuna
(I know, I know, no cans - Well, do you want to try to make flaky Tuna from scratch?)

1 Hass Avocado - Chopped into medium-sized chunks.


1/2 c. Chopped Celery

Just in case you didn't know what chopped celery looks like.
1 Roma Tomato - Diced

3/4 c. Plain, lowfat or nonfat Yogurt

1/4 t. Garlic Powder

1/4 t. Ground Black Pepper

Salt - To taste.

Directions:


1.  Not much to it.  Drain the can of tuna.  Mix all the ingredients together in a bowl.


2.  Chill and serve.  You can eat it on a sandwich, on a lettuce leaf as a salad, or however you want.
It's Tuna Salad, for gosh sakes! 


Sunday, June 17, 2012

Roasted Red Pepper Hummus

Today, I am posting from a family reunion in Erie PA.  As I'm posting this early, and I'm away from my kitchen, this will probably not be what I bring, but it would be a great idea if I had the facilities for it.

I love hummus.  I had eaten it for a long time, never having a clue how to make it.  A roommate of mine from seminary, Ryan, had lived in the Middle East and was (is) an awesome cook of Middle Eastern food.  He tried explaining Hummus-making to me once, but I didn't even know what some of the ingredients were.  After a while, I started looking up various recipes, and began picking and choosing things I liked about each one.

Then, I started to experiment.  Hummus is great on it's own; however it turns out, you can add all kinds of things to it to make it EVEN BETTER.  My favorite addition to Hummus is Roasted Red Pepper.  While the Red Pepper is completely optional, and you can use this recipe without it, it does give it a nice savory smoky flavor.

So, here goes:

Ingredients:
1 Red Bell Pepper (Again, optional to Hummus, and can be left out.)

2 c. Chickpeas - drained and rinsed

3 Garlic Cloves

4 T. Tahini Paste - Preferrably Raw
*It's a paste made from Sesame Seeds.  You can find it in Organic and International food aisles.


1 T. Olive Oil

1/4 c. Water

3 T. Lemon Juice
*If you use Lemon Juice from a bottle, only use 2 T, and add Water to it.  If it's fresh Lemon Juice use the full amount, and keep them separate.


1/2 t. Ground Cumin

1/2 t. Sea Salt
*Don't use Table Salt, or it will be too salty.

Directions:

1. Cut the Red Pepper into quarters.
*To cut up a Bell Pepper, I find it's helpful to cut the raised part off the top, first, being careful not to cut below the stem.  Then you can clear the insides and seeds out before quartering it.


2.  To roast the Pepper, put the Pepper quarters on a small grill, and broil them on high.  Check them occasionally.  When they start to blacken on the tops, take them out, and turn them over.  Broil the other sides until just beginning to blacken.  Then, take them out and put them aside.  You can roast the Peppers while you are doing the following steps.


3.  While the Peppers are roasting, put the Garlic and Chick Peas into a food processor.  Process them until they are granulated.  You may have to stop the food processor and scrape the sides and bottom with a rubber spatula occasionally.


4.  With the food processor running, add the Tahini and Olive Oil.  If you have fresh Lemon Juice, add it now.  If you are using the bottled kind, mixed with water, hold off until after the next step.

5.  Add the cumin and Sea Salt.

You see how I use a very precise measuring spoon

6.  Gradually add the Water or Water/Lemon Juice Mixture until the hummus reaches the desired texture.  As before, you will probably have to stop the food processor and scrape the sides and bottom with a rubber spatula at least once.


7.  Once the Hummus is at the right texture, with the food processor running, drop the roasted Pepper pieces in, one at a time.  Let it run until the Pepper pieces are completely blended into the Hummus. 


*A note about Raw Hummus:
If you are a Raw Foods person, you can make Raw Hummus.  Chick Peas require little cooking to begin with, and can be eaten after just soaking overnight without boiling them at all.  Raw Chick Peas can be bitter, so I recommend using a little more Salt, Cumin, and Lemon Juice.  Also, make sure the Tahini is raw and obviously don't do the roasted Pepper.

Sunday, June 10, 2012

The Ketchup Challenge

This Sunday, I am away, visiting the Midwest.  I'm spending this Sunday in Oklahoma City, becoming a godfather to Stephen George, the son of my long-time friends Stephen and Geni.  Later today, we're heading up to Kansas to visit the in-laws.  Sorry Winfield friends, I'm going straight to Topeka this time.  Nonetheless, as I am in the Midwest, there's nothing more Midwestern than Ketchup. 

Making Ketchup from scratch actually first came up about a month ago.  Every Monday, I volunteer at the George Street Co-op.  One Monday, I was cashiering, and there was a lull.  Several of us were sitting around bantering, and somehow, making Ketchup came up.  "How hard could it be?" we wondered.  One of us grabbed a bottle off the shelves to see what was in it.  Then, we started talking about what it would take to start from tomatoes and make Ketchup.  Thus, my challenge.  I decided I would learn to make Ketchup.

The next day, I was in my office, and I mentioned this to my secretary, Nancy.  Lo and behold, she actually had a recipe to make sugar-free Ketchup.  A few days later, she brought me the recipe.  Using the basic ideas, I modified it to start from tomatoes, use a natural sugar and different spices.

I will say that I have never been a huge fan of Ketchup.  I've never hated it; it has just never been my condiment of choice.  When I was a kid, my dad mentioned that his grandmother used to make it from scratch, and it was totally different than what you get from a bottle.  After having tried it, I can tell you the difference is astounding.  This ketchup has a tart, zingy, sweet flavor.  It's really pretty amazing, if I do say so myself.

I will admit, though, that it isn't as ketchupy as you might expect - which is probably why I like it.  As I've had others try it, some say they really like it, others say it's too sweet, and others would like it more salty or sour.  I may tweak this recipe as I go along and do an update.  But, it was a fun challenge, either way.

Ingredients:

3 lbs. very ripe Tomatoes

1/2 small yellow Onion

2 cloves Garlic

1/2 c. Sucanat
*Also known as Panella or Papelón sold in granular form.  If you can't find it, you can use Brown Sugar.

1/2 c. Red Wine Vinegar


1 t. Paprika

1/2 t. Tumeric

1/4 t. Chives

1 fg. of the following:
Rosemary
Thyme
Basil
Parsley

Directions:
1.  Wash the tomatoes, and cut any of the green parts off the top as well as any bad spots.  Squeeze the seeds out.


2.  Combine all the ingredients in a blender.  This may take two rounds, depending on the volume.  Blend on liquefy for at least a full minute, so that there are no chunks remaining.

3.  Put into a Crock Pot and cook on high without the lid for 5-6 hours.  Stir occasionally, scraping the sides.  Cook until it reaches the desired consistency


4.  When finished, pour into a Mason jar while Ketchup is still hot, and seal the lid on it.

Now all I need are French Fries

Sunday, June 3, 2012

Homemade Pizza

I just thought today, I'd go with a standard.  I've been trying to make Pizza for a few years, and I've found things I've liked in various recipes, and things I haven't liked.  The recipe for the dough is a variation on a couple different recipes.  The method for cooking it is a variation on something I found in a Mario Batalli cookbook, although pretty liberally adapted.  This recipe calls for vegetable toppings, but you can really top it with whatever you want.  So, here goes:

Ingredients:
Dough:
1 1/4 c. Hot Water

2 1/2 t. Active Dry Yeast

1 1/2 t. Sugar

2 c. Whole Wheat Flour

1 1/2 c. All Purpose Flour (I prefer unbleached)

1 1/2 t. Salt

1/4 c. Olive Oil

Toppings:
1 c. Marinara Sauce  
(I know, it breaks my no-can rule, but I'll post a recipe for it later)


Various Vegetable Toppings
(Or meaty toppings, if you like)
*In honor of Trinity Sunday, I'm doing THREE vegetables: Squash, Onion and Bell Pepper. 

2. T. Olive Oil.

2 c. Shredded Mozzarella Cheese

1 T. Garlic Powder

1 T. Oregano

Directions:
1.  Wisk the water, Sugar and Yeast together.  Set the mixture aside for 10 min. until it gets foamy on top.

2.  Put the Flour and Salt together in a Kitchen Aid Mixer with a dough hook.  Start it on low, and slowly pour in the Yeast mixture and Olive Oil.  Let it mix together thoroughly.
*You can do this all in a large mixing bowl.  Use a wooden spoon to stir everything together and then knead for 8 - 10 min.  

3.  Oil a large mixing bowl.  Put the dough in it.  Turn the dough over once, to cover it in oil.  Cover with a tea towel, and let it rise for 1 - 1 1/2 hrs.
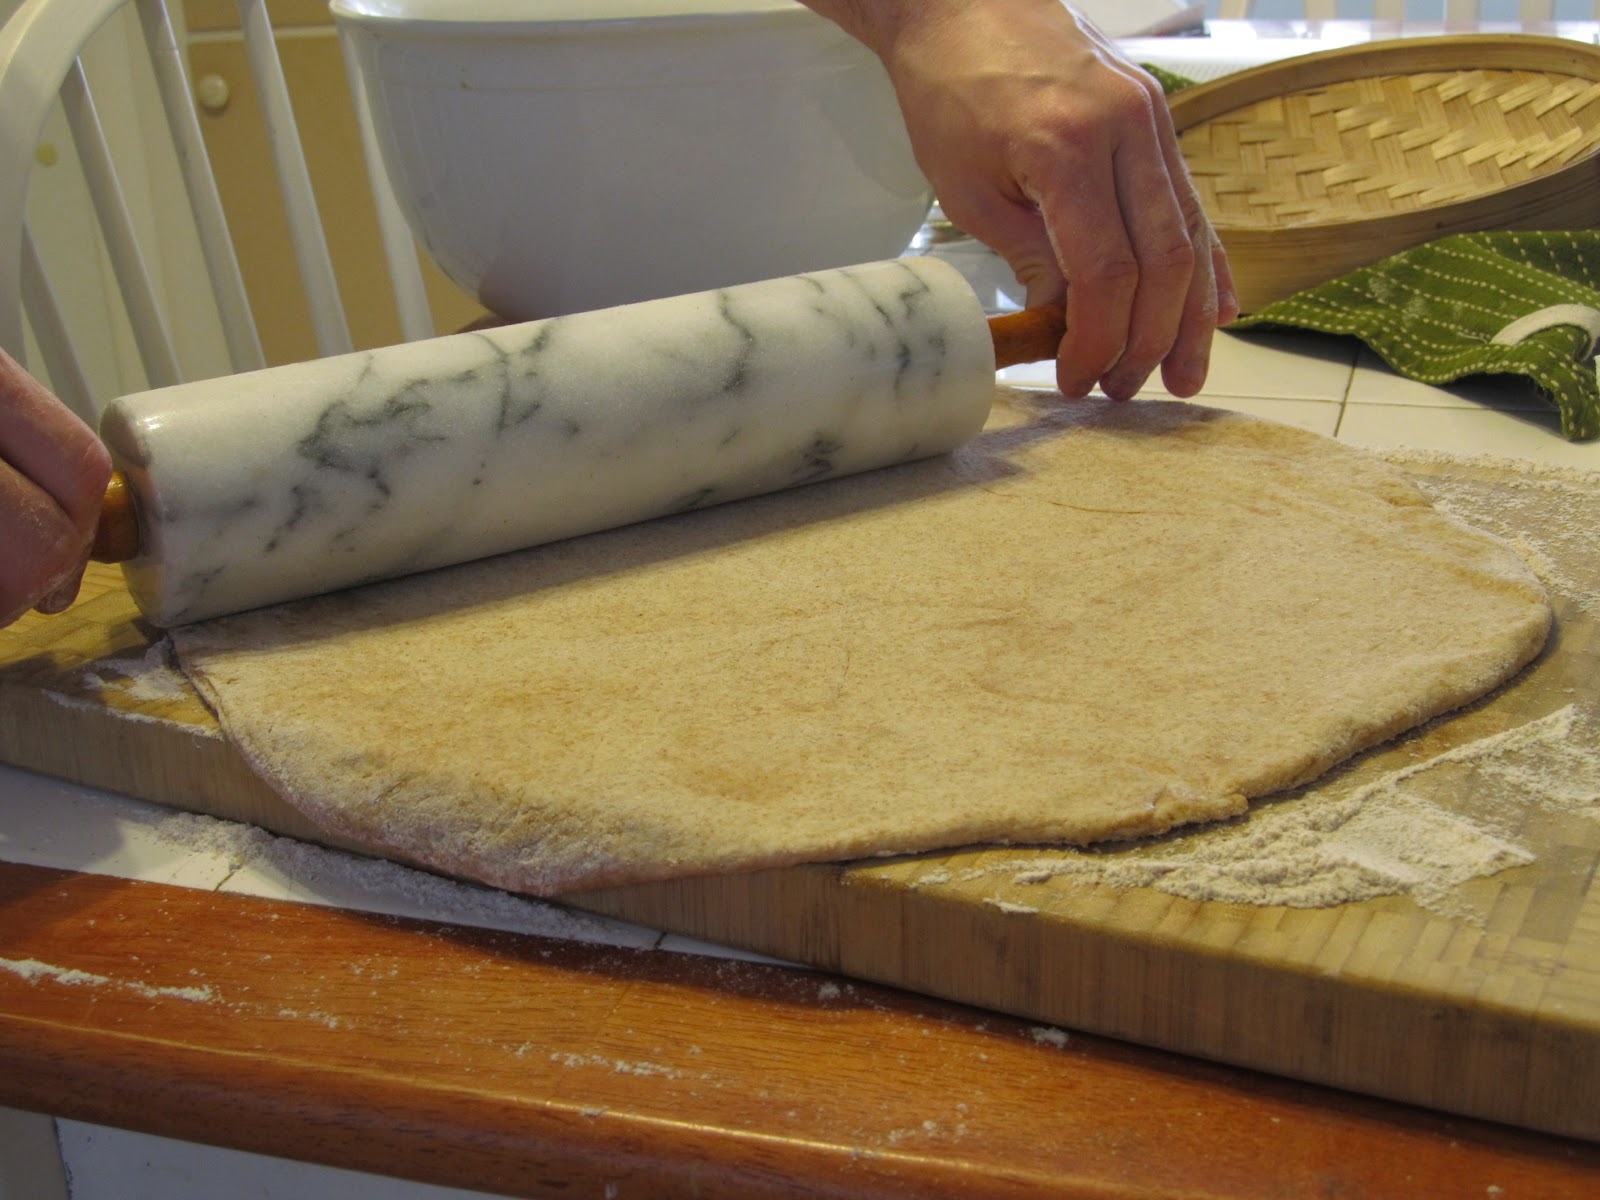
Dough!

4.  Just before getting ready to roll out the dough, preheat a large oiled cast iron skillet over medium-low heat.  Let it get as hot as possible before cooking.

5.  Punch the dough down.  Cut it in half.  Put half in the refrigerator for later use or use it for bread sticks.  With the remaining dough, roll it into a ball.  Then, with a rolling pin, roll out on a well-floured surface into a large round pizza crust shape.

6.  Carefully place the rolled out dough into the preheated cast iron skillet.  Move it around as quickly as possible to center it, as it will start cooking immediately.  With a fork, press the dough around the sides of the skillet to create a lip around the edge of the dough.  Then, stab several holes on the bottom of the crust to keep it from bubbling up.


7.  Cook the crust apx. 5. min. until dark brown on the bottom, when you lift it.  Then, transfer the crust to a pizza stone or grill.

Trinity of Vegetable
8.  In the skillet, heat 2 T. of Olive Oil, and sauté the vegetables, just enough that they stay a little crisp, but are hot.

9.  Preheat an oven with a broiler to 350ºF. (177ºC).  

10.  With a spoon, spread the Marinara Sauce onto the Pizza crust.  Then, top it with the sautéed vegetables.  Sprinkle on the Garlic Powder and Oregano.  After than, sprinkle the cheese on, covering the pizza evenly, making sure you cover it to the edges.

Sans Cheese

11. Place the Pizza on the stone or pan on the top rack of the oven.  Then, set the broiler to low.  Broil it for about 4-5 minutes, just to where the cheese is melting.  Turn the Pizza 1/4 Turn and continue to broil the pizza until the cheese starts to brown.

12.  Take the Pizza out.  Slice up and enjoy!

Kristen nom-nom-noming her first piece